How to add mouth & nose to a knitted toy

The following photo tutorial shows you how to add a mouth and nose to a knitted toy such as my Robert & Rosie Rabbit pattern

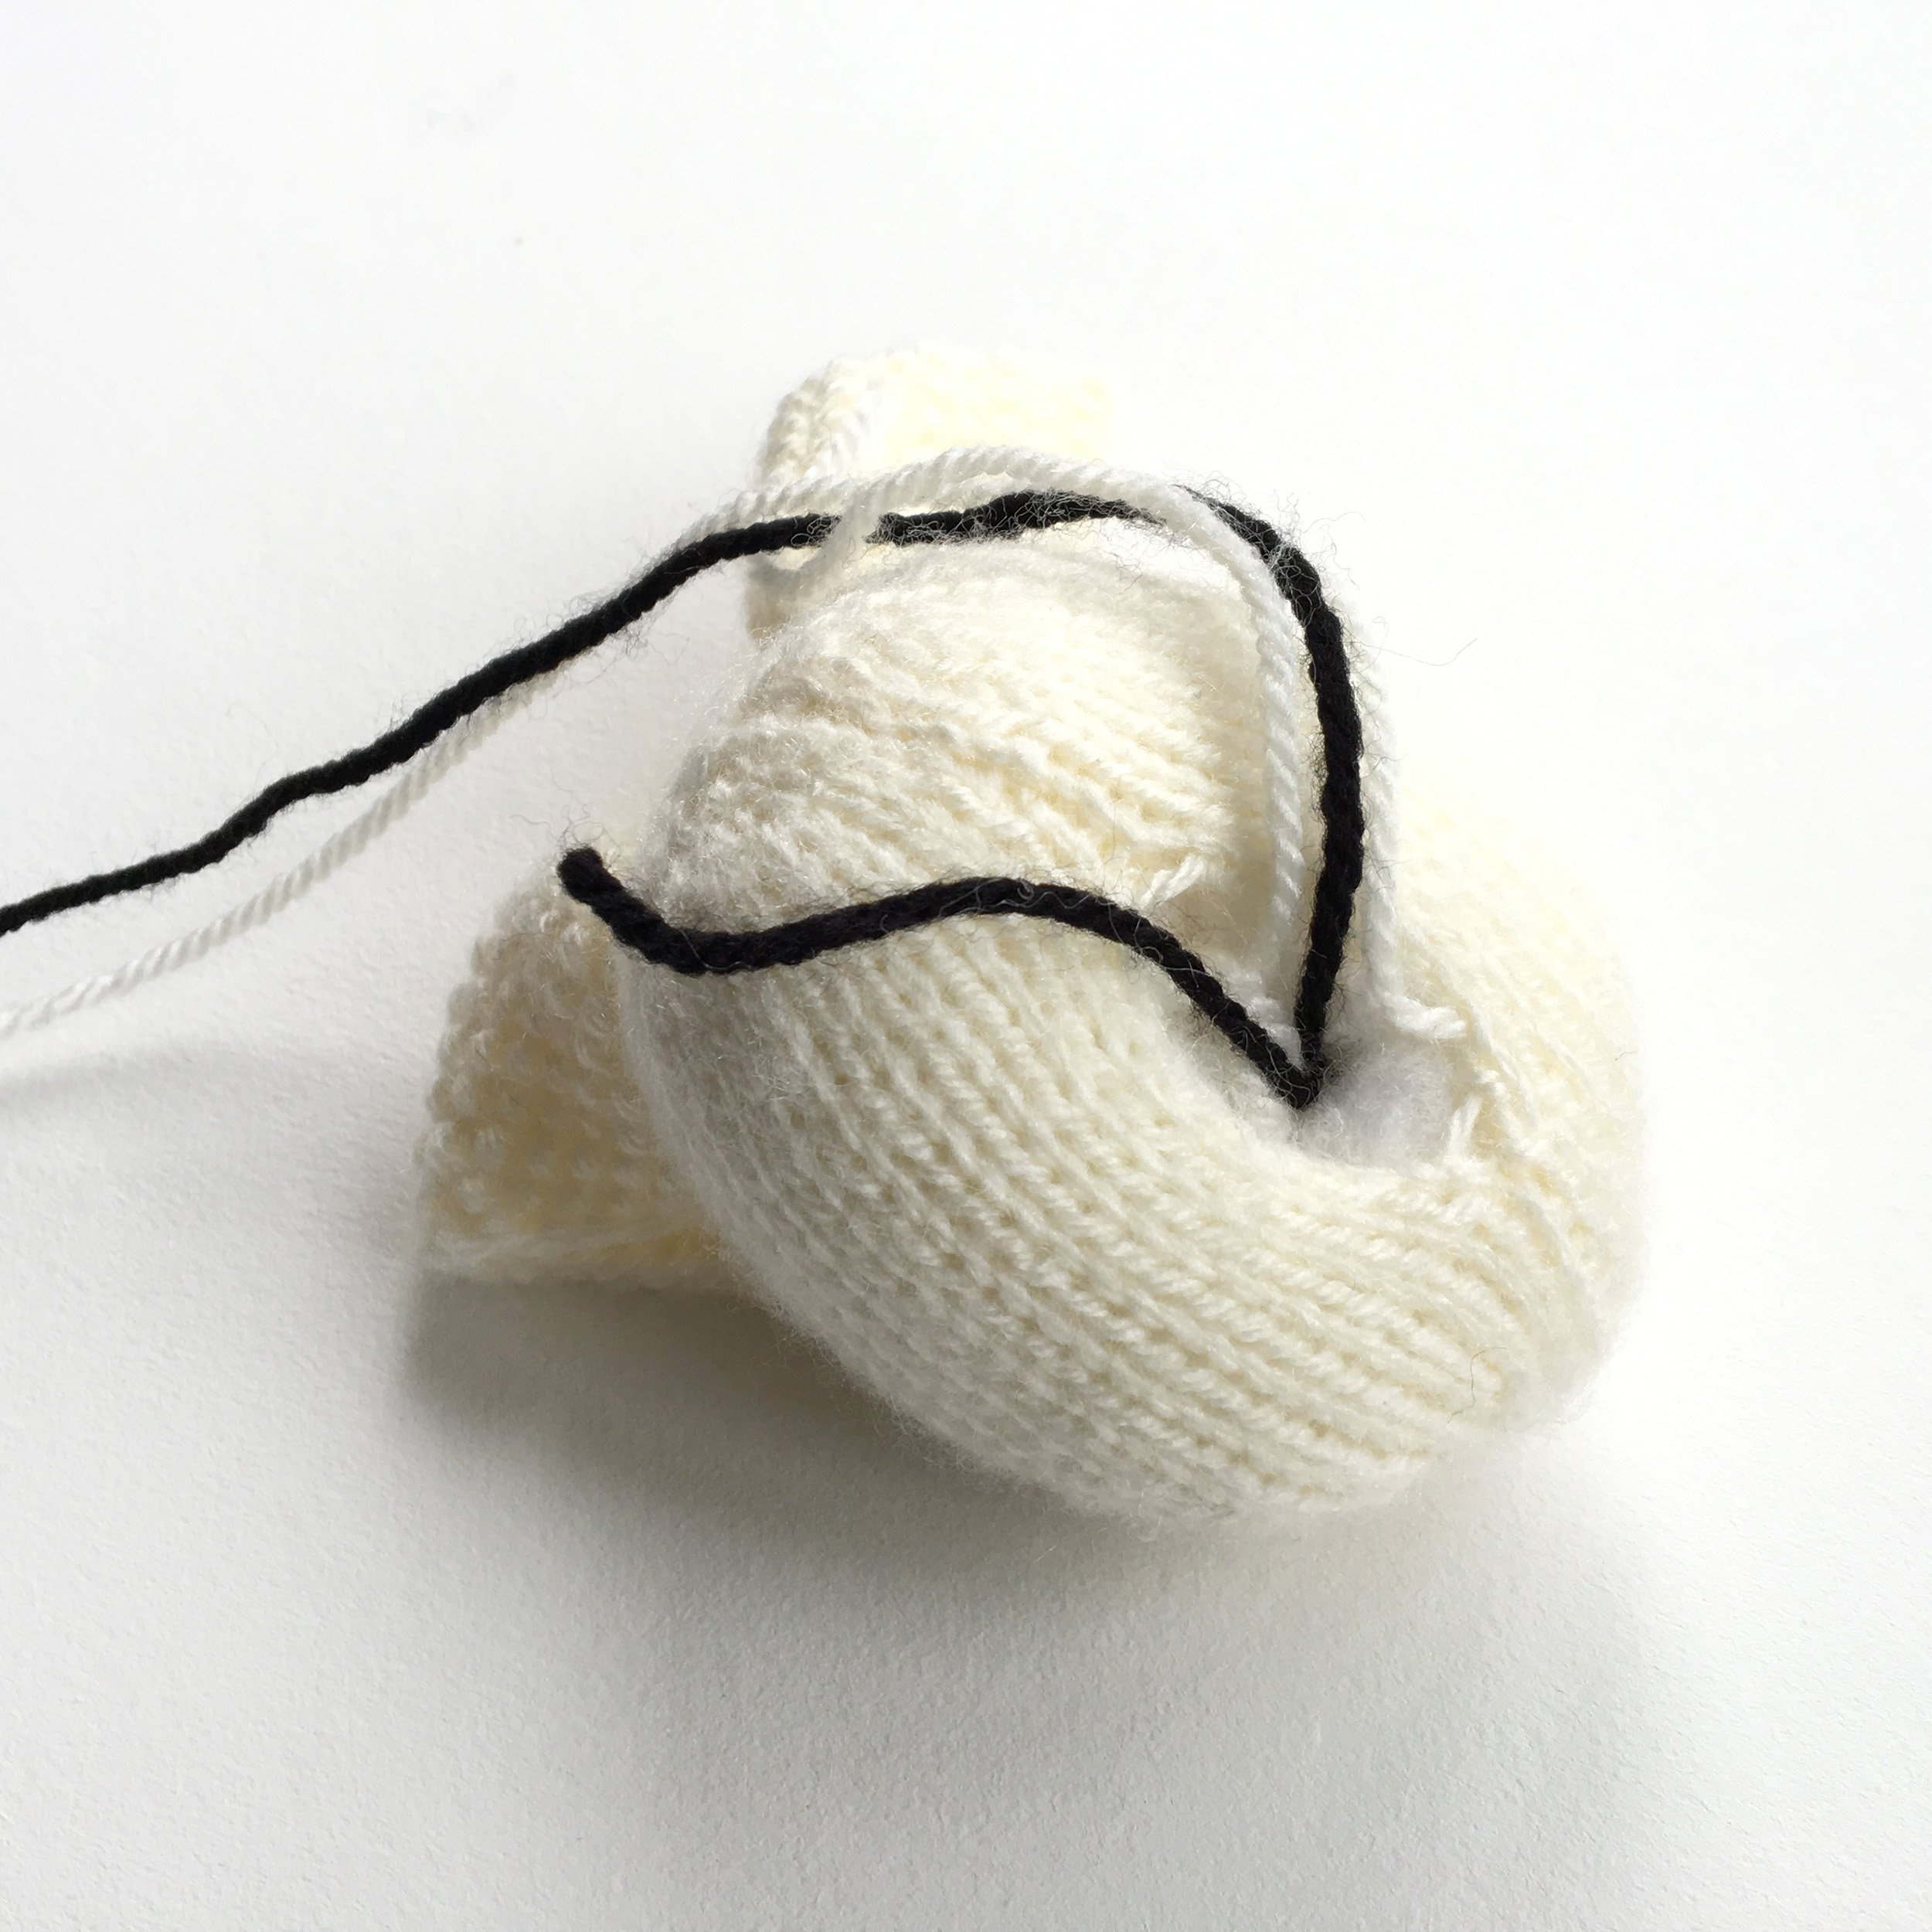
1. Using a yarn similar in weight to the one the toy was knitted in, bring your yarn up through the opening in the back of the head. Leave a long tail of yarn protruding at the back - enough to tie off later.
Bring the needle out on the left hand side of the nose, just below the eyes.
Take it in again on the right hand side. I used the decrease stitches as a guide and measured to ensure they were parallel with the eyes.

2. Bring your needle out at the centre of the nose, ensuring the working yarn is below the needle.

3. Once you have pulled your needle through, the basic shape of the nose will be formed.

4. Take your needle back into the head about 1 cm directly below the nose and out again where you want the left hand edge of the mouth to be.

5. With the working yarn below your needle, take your needle back in to form the right hand side of the mouth and back out again at the centre of the mouth at the same point that it went in at in step 4.

6. Take your needle back into the head immediately below then yarn that formed the mouth to secure it in place.
7. Bring your needle back out at the opening at the base of the head and tie the 2 yarn ends securely together. Bury them in the stuffing..
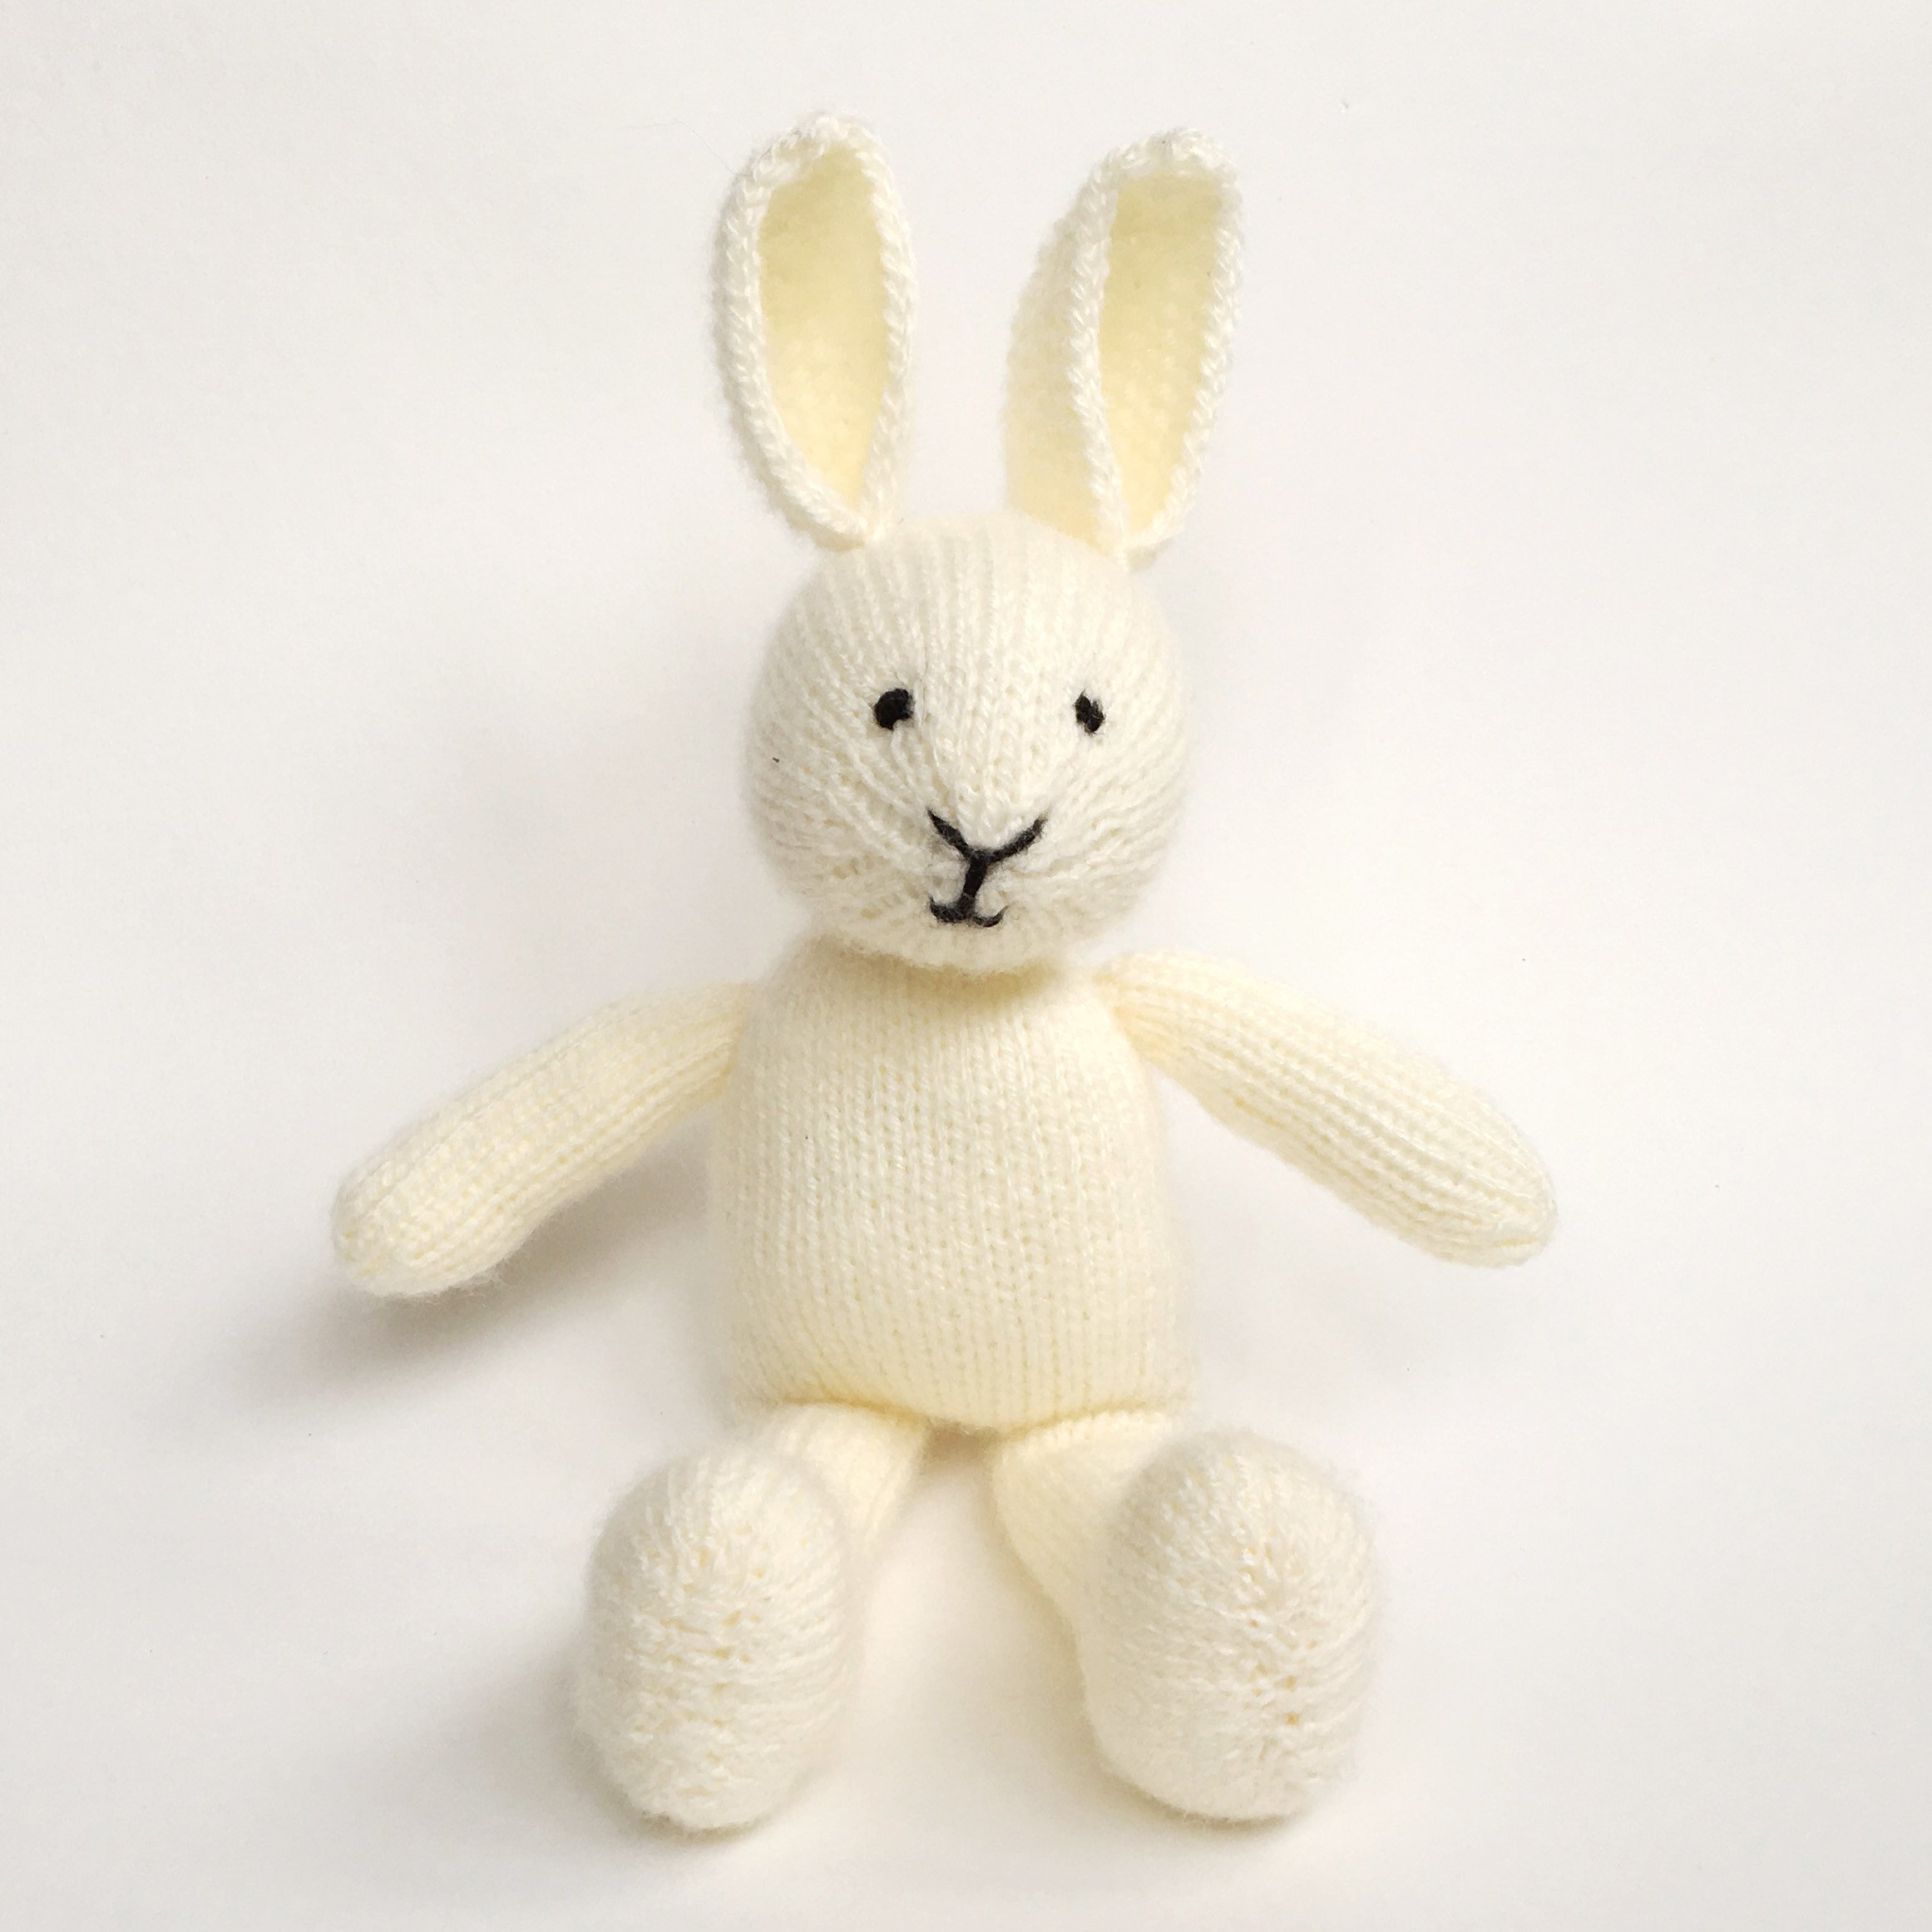
I hope your knitted toy is happy with its new face!
If you would like to knit a rabbit similar to this one, you can find my pattern here